Platform Walkthrough
If you're looking to harness the power of verifiable credentials and streamline your reusable identity use case, you've come to the right place. In this comprehensive tutorial, we will walk you through the steps to get started with Trinsic's Dashboard and White Label Wallet products, enabling you to issue, manage, and verify credentials seamlessly.
This tutorial will teach you how set up a basic verifiable credential ecosystem, define credential templates, assign credential issuers, issue a verifiable credential, manage verifiable credentials in a personal wallet, and verify a credential with Trinsic. There are instructions in text and video.
For the purposes of this tutorial we will be dealing with the use case of an employee badge, but feel free to try different things as you follow along.
Create an Ecosystem
An ecosystem is a set of entities that can interact with a user's identity through a digital identity wallet. It typically includes an IDtech provider, issuers who transform raw data into verifiable credentials, holders who control their own identity, and verifiers who can trust credentials without maintaining their infrastructure by relying on trusted issuers within the ecosystem.
Learn More
To learn more about ecosystems, see our documentation on ecosystems
When you were first onboarded on Trinsic Dashboard you were prompted to create an ecosystem. For the purposes of this tutorial we will create a new one.
Steps
- Go to the Trinsic Dashboard and log in.
- Click on the vertical three dots (by your ecosystem name at the top of the navigation menu).
- You should see a dropdown menu with a list of the ecosystems you are member of. Click on Add Ecosystem
- Select your ecosystem plan and click on the respective Continue with… button (the free plan is sufficient for this tutorial).
- You will be taken through the ecosystem onboarding at this point. Feel free to read through it or skip it for now.
Access the White Label Wallet
Trinsic leverages cloud wallets to help you manage verifiable credentials. The White Label Wallet allows identity holders to easily access and manage the credentials that have been issued to them, and issuers have a centralized portal where they can quickly issue a credential from templates they have been assigned to.
Learn More
To learn more about how wallets work, see our documentation page on Wallets.
The White Label Wallet experience is tailored to your ecosystem branding that can be configured in the Settings > Branding page in the dashboard.
Watch the video below for a good overview on how to use your White Label Wallet. We then proceed to issue your first verifiable credential.
Create a Verifiable Credential Template
Credential templates (i.e., schemas) allow providers to specify the formats and types of verifiable credentials issued to the ecosystem’s identity holders. They serve as an abstraction that simplifies initial setup.
In our use case of employee badges, employees will receive their badge in a digital format as a verifiable credential. Our ecosystem needs to define a credential before issuers are able to issue the employee badges.
Learn More
To learn more about credential templates or verifiable credentials, see our documentation on templates and credentials.
Create the Employee Badge template
You can create credential templates with Trinsic using the Dashboard or the SDK. In this tutorial we will show you how you can do that in the Dashboard.
Steps
- Go to the Trinsic Dashboard home.
- In the navigation menu, click on Templates and select Credential Templates.
- On the top-right corner, click on the Create a template button.
Fill the Create new template form
In this tutorial we will create a credential template that will have the shape below, but feel free to explore the different options in the form and add as many sections as you’d like.
Employee badge template
- Template Name: Employee Badge
- Template Description: A simple employee badge credential used to gain access to the office building.
-
Section name: Personal Info
Name Type Display Name Description employeeNoNumberEmployee Number Employee’s number fullNameStringName Employee’s full name jobTitleStringTitle Employee’s title orgStringOrganization Employee’s org
Make sure to leave the Allow extra attributes checkbox unchecked and press the Create template button.
You will be taken back to the Credential Templates page and you will see your new credential template in the table. Congratulations!
Notice how it says No Issuers. You can still issue a credential even without issuers registered but the issued credential will be considered invalid though. You will register youself as an issuer in the next section.
Register an Issuer
Issuers are the source of data in an ecosystem. They transform their raw data into verifiable credentials using templates. In a Trinsic ecosystem, an issuer must posses a wallet; therefore, and issuer can also assume the role of a holder. We assign issuers in an ecosystem by first making sure they posses a holder wallet and then registering their identity as an issuer to a particular credential template.
Learn More
To learn more about issuers and governance frameworks, see our documentation on Issuer and Governance.
For the purposes of this tutorial you will assign yourself as an issuer, but if you would like to assign someone else make sure that a wallet is created for them in the Participants > Wallets page in the dashboard.
Steps
- Go to the Credential Templates pages in the dashboard.
- Find the row with the EmployeeBadge credential template and click on the Edit button at the end of the row.
- In the Register issuer by email field type in your email address associated with your wallet.
- Click on the Add issuer button
Done. Easy as that you registered yourself as an issuer authorized to issue the EmployeeBadge credential in your ecosystem. You can see a list of all the registered issuers in your ecosystem in the Participants > Issuers page in the dashboard.
Issue a Credential
After registering yourself as an issuer, you should have received an email notifying that you are an approved issuer of the EmployeeBadge credential in your ecosystem. The email contains a link that you can use to start issuing credentials in the White Label Wallet. Clicking that link will take you to the issuer portal in the White Label Wallet and open up the issuance form.
Follow the steps below to issue your first credential.
Steps
- Go to your White Label Wallet and log in:
<your-ecosystem-name>.connect.trinsic.cloud. - In the navigation menu, click on Issuer and select Issue Credential
- In the Issuer portal page you will see a card for each credential template you have been assigned as an issuer. Click the card for your Employee Badge credential.
- Type the holder’s email address in the Recipient email field (your email in this case).
- Fill the remaining of the form with the desired credential data and click on the Issue directly button.
Congratulations! You have issued your first verifiable credential.
Manage your Credential
After issuing the credential to yourself, you will receive a notification in your email with a link to visualize your credential in the White Label Wallet. Clicking that link will take you to your credential details view as shown below:
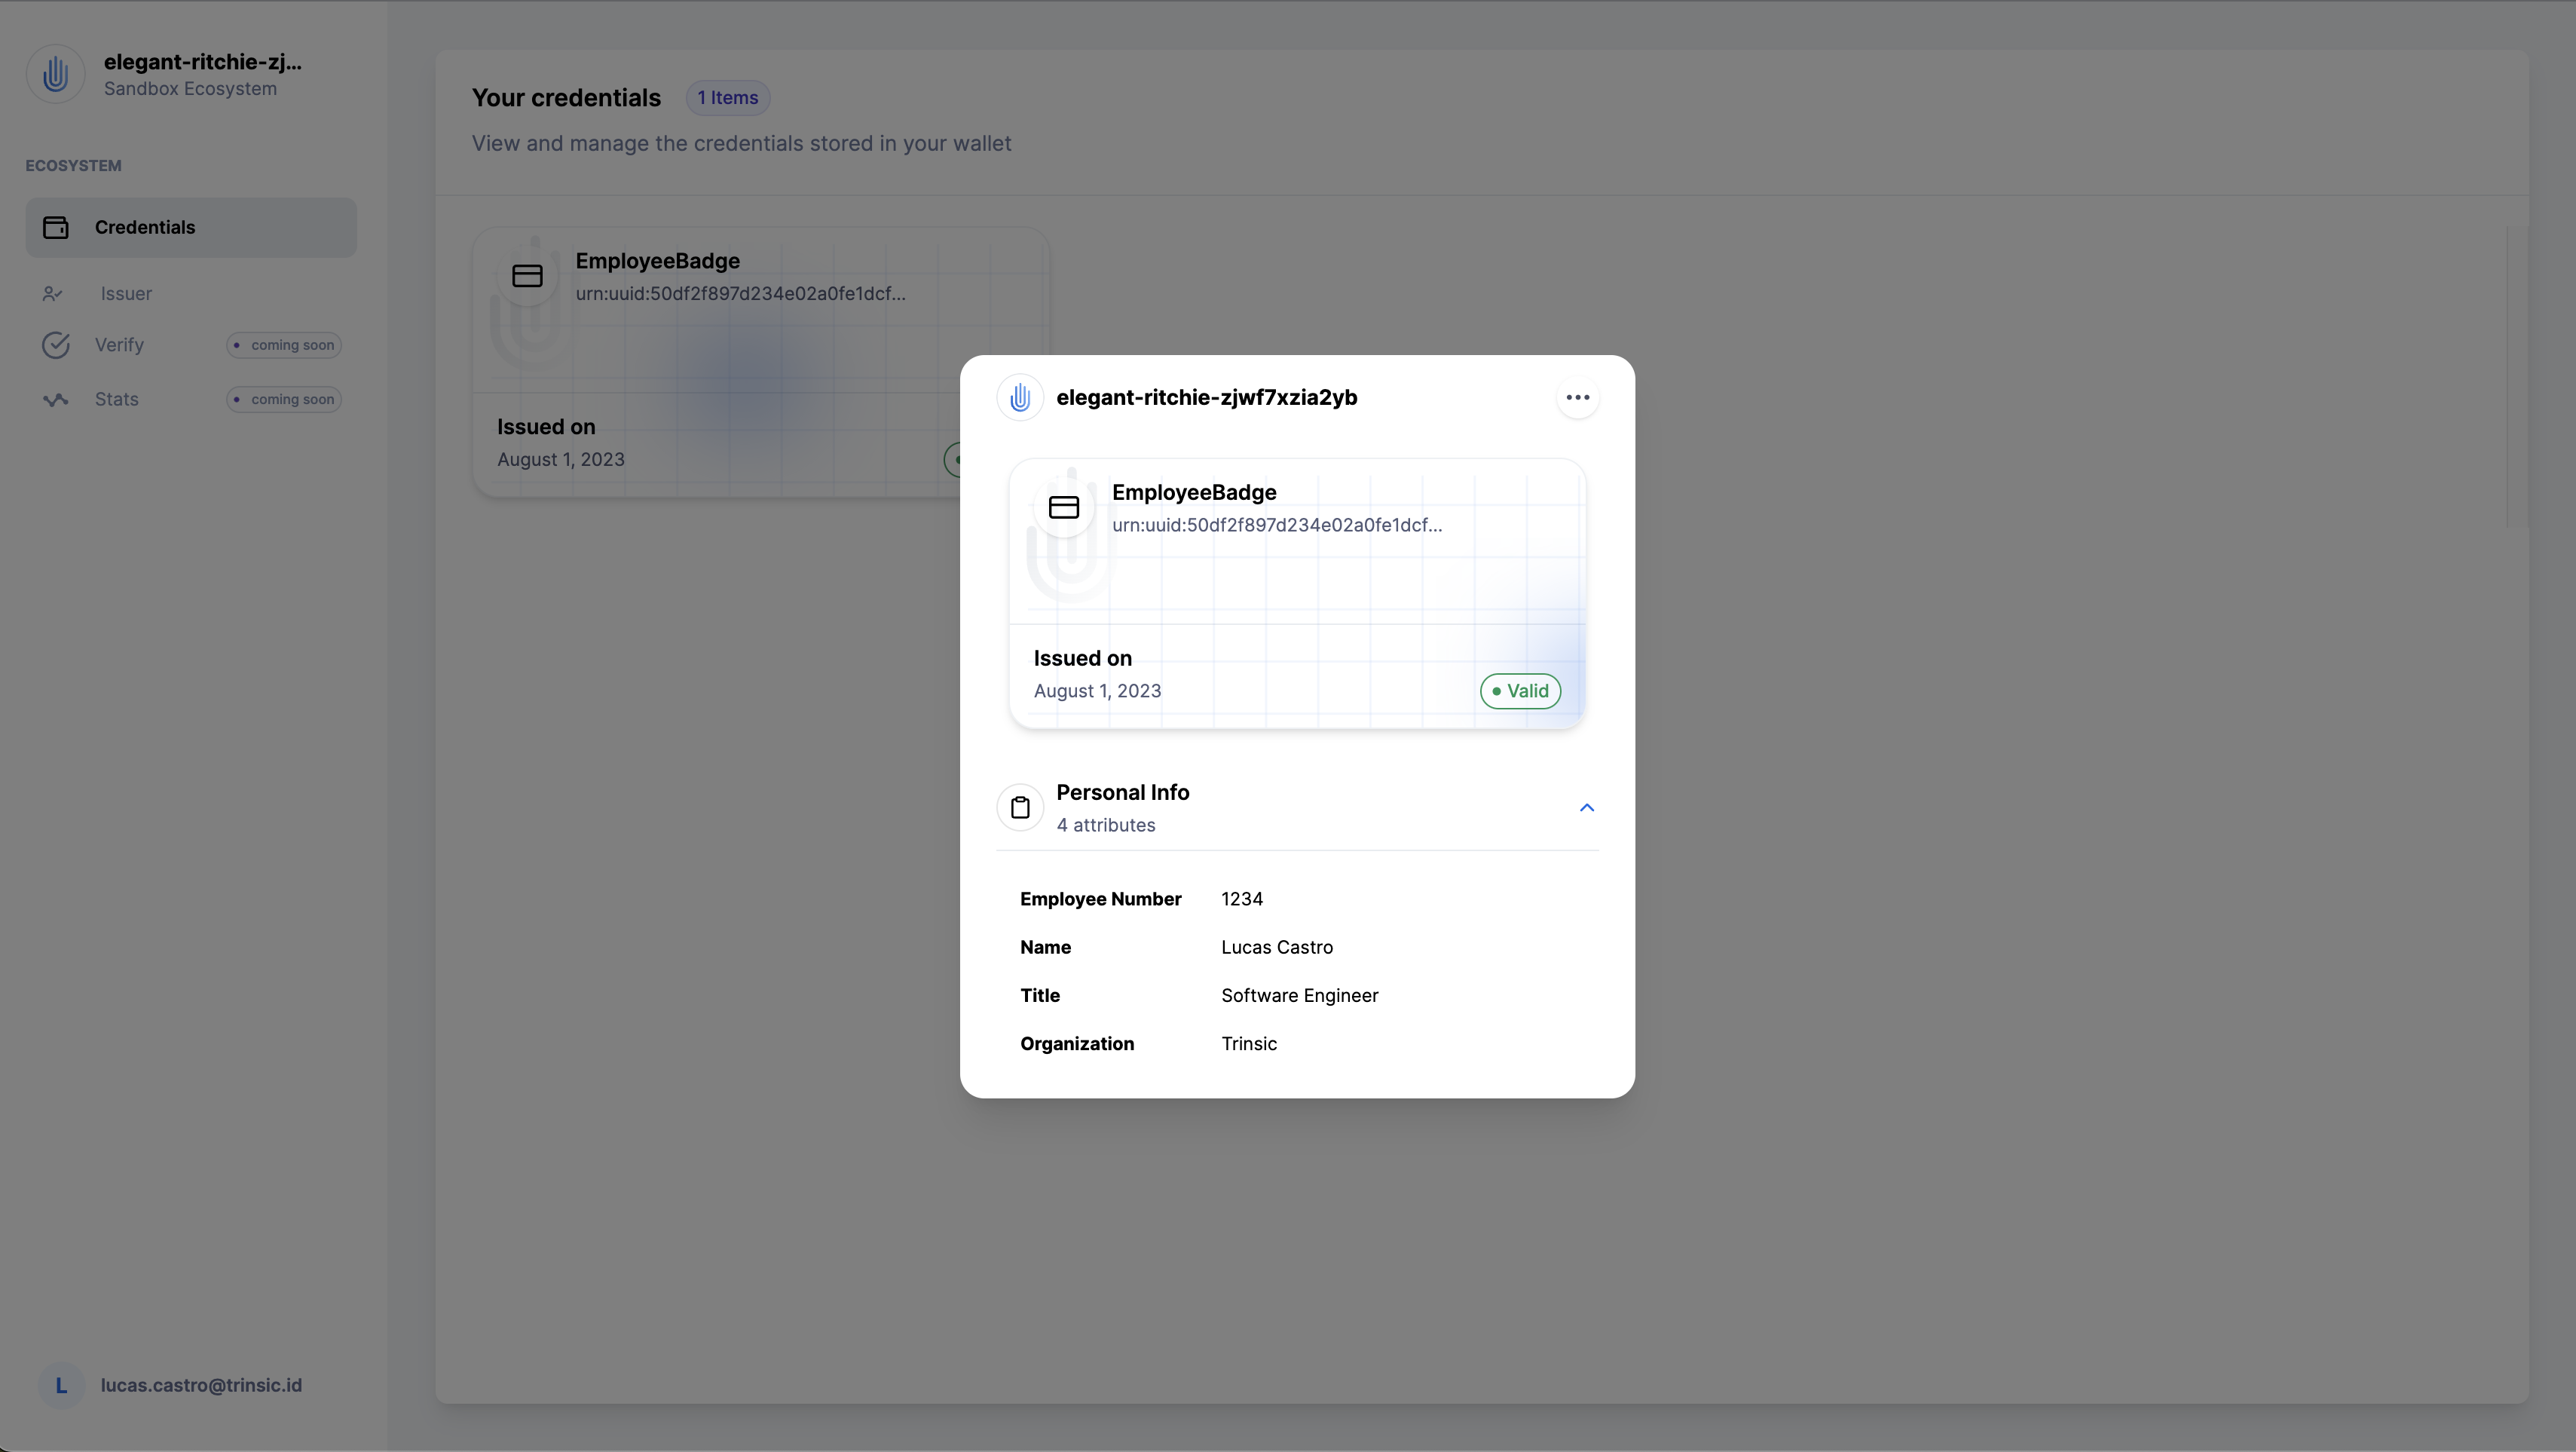
You can see all of the credentials you hold in the Credentials page of your White Label Wallet. You will also be able to export your credential as a JSON file, delete the credential, and add the verifiable credential pass to your Google or Apple wallet (if your ecosystem has these features enabled.)
Add your Verifiable Credential to your Google or Apple Wallet
Ecosystems on the Build or Launch plans can enable their holders to add their verifiable credentials to their mobile wallets as verifiable credential passes for quick validation flows. The video below shows how that works.
Delete your Credential
We offer you the ability to delete your verifiable credential. This action is irreversible and will render your credential unusable if you exported it.
Disclaimer
We included this section for your information, and we don’t expect you to follow the steps below. You can skip to the next section.
Steps
- Select your credential in the Credentials page in the White Label Wallet.
- Click on the three dots at the top of the credential details view
- Click Delete Credential option.
- Follow the prompts
Verify your Credential
Up until this point we walked you through a working demo you can safely employ in production. The philosophy behind the white-label wallet and the issuer portal is to keep you from reinventing the wheel when it comes to your use case.
This next step is purely for demonstration purposes and does not represent a real use case of a verification flow. We expect you as a provider to leverage Trinsic’s tools and SDK to build your verification strategies in partnership with your verifiers.
Since in this example we don’t have a verifier portal built, we can use the Dashboard verify function as a proof of concept and demonstration that your newly issued credential is indeed valid and belongs to you.
Learn More
To learn more about verifications, see our documentation page on Verifications.
Steps
- Go to the Credential Templates pages in the Dashboard.
- Find the row with the EmployeeBadge credential template and click on the Verify button at the end of the row.
- A popup will open. Log in to the OIDC service if prompted, and follow the steps until you reach the presentation page.
- In the presentation screen, mark the attributes you wish to disclose (e.g., Employee Number, Name, etc.)
- Once you are done marking the attributes, click on the Verify button
If everything worked out, the pop up window should close and you will be back to the dashboard where you will notice a new modal showed up with the JSON view of your verifiable credential.
Notice how in the profile.credentialSubject field only the attributes that you disclosed on step four are included. Additionally, the cryptographic proof of your credential can be found in the profile.proof field.
Conclusion
Congratulations! If you've gotten this far, you've now used the Trinsic Dashboard and White Label Wallet to issue and verify information with a verifiable credential.
You’ve learned how to set up a quick demo using the White-label wallet and the Issuer Portal in the White Label Wallet and got your feet wet with verifications using the Dashboard.
There is much more you can do with Trinsic.
- Try implementing a full use case using our SDK with this video tutorial
- Integrate other authentication methods in the White Label Wallet
- Build your identity product with one of our SDKs
- Join our developer community
Whatever you choose to do next, we are so excited to build the future of identity with you.