Getting Started (old)
Test vs Live EnvironmentsTrinsic offers two different environments: Test and Live. API Keys are scoped to environments.
The Test environment provides access to a number of Trinsic-hosted "mock" Providers, as well as the ability to perform test verifications with the many Providers within Trinsic's network which support a test mode. Verifications are performed with fake credentials, and do not incur a per-transaction cost.
The Live environment is suited for production use-cases. All Identity Providers within Trinsic's network are available for use in this environment. Verifications are performed using real credentials, and incur a per-transaction cost.
Use the Test environment to explore and experiment with Trinsic.
Get Your API Key
Before you can get started with identity acceptance in your application, you must first sign up on the Trinsic Dashboard and fetch your environment-specific API Key.
- Visit dashboard.trinsic.id.
- Sign in to your account using your business email.
- If you're not already onboarded, you can sign up yourself or schedule an onboarding call here.
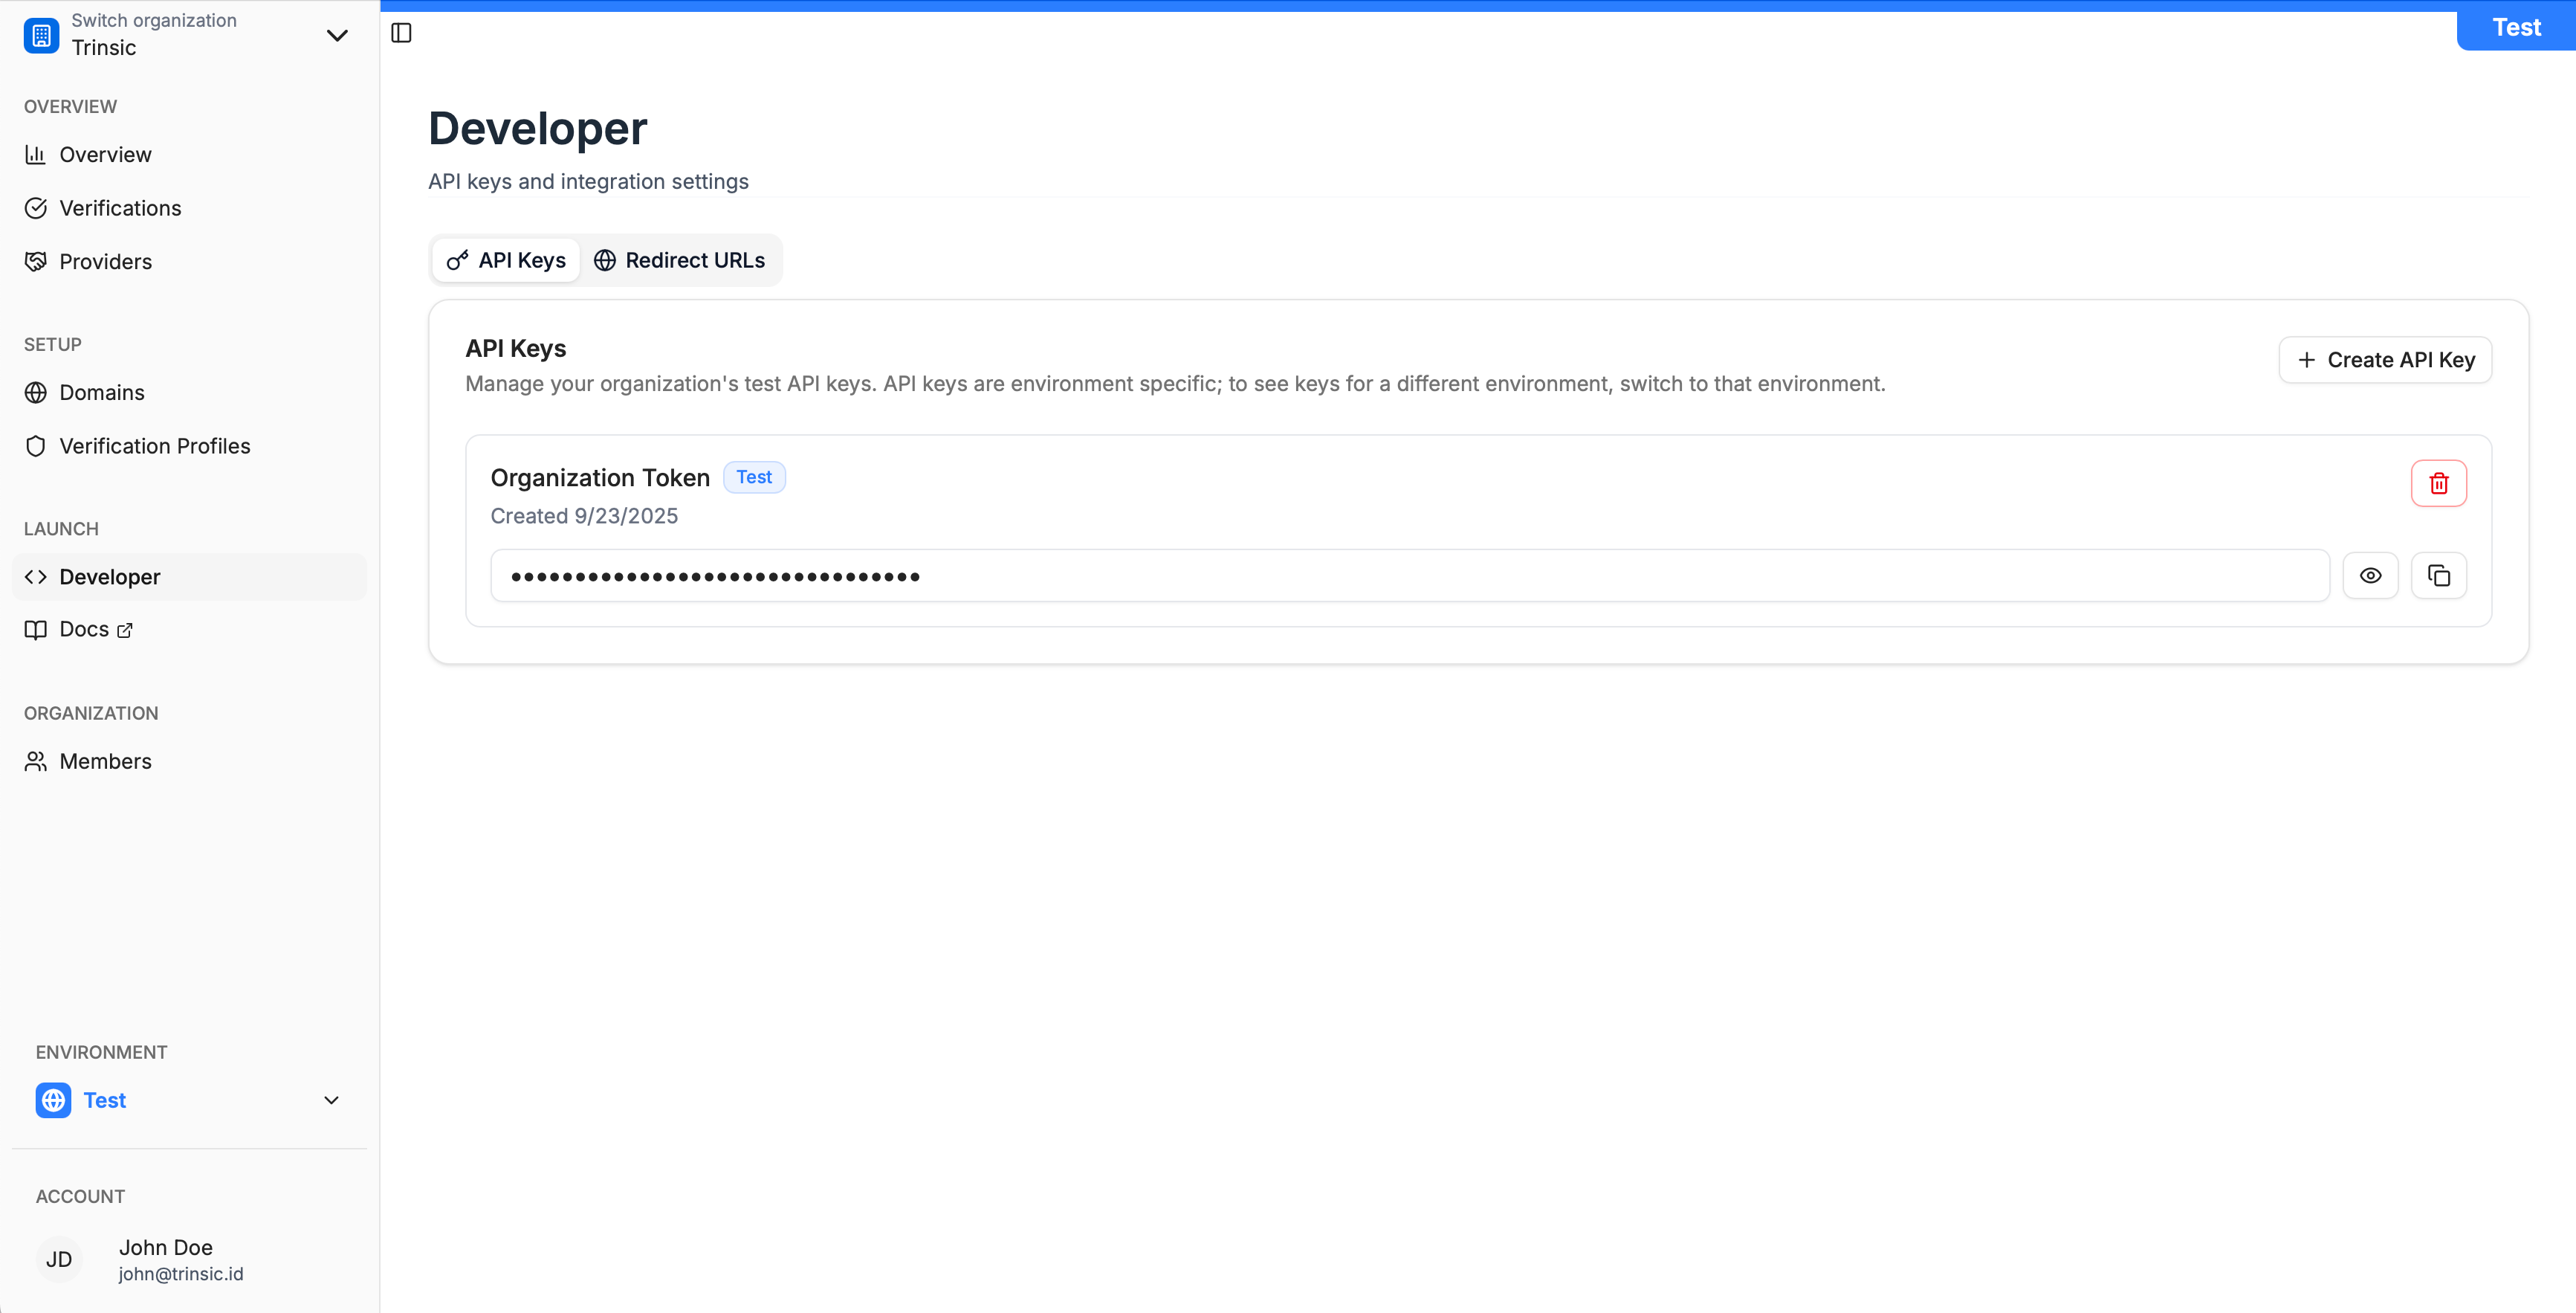
- Ensure you're on the Test environment by using the environment switcher in the bottom left.
- Go to the Developers page and click to copy your API Key for the Test environment.
- Save your API Key somewhere secure; you will need it to make API calls.
Create a Verification Profile
Next, create a Verification Profile in the Test environment. All verifications are tied to individual Verification Profiles; think of them as bundles of configuration for a set of Providers, typically tied to a specific use-case.
- Visit the Verification Profiles page.
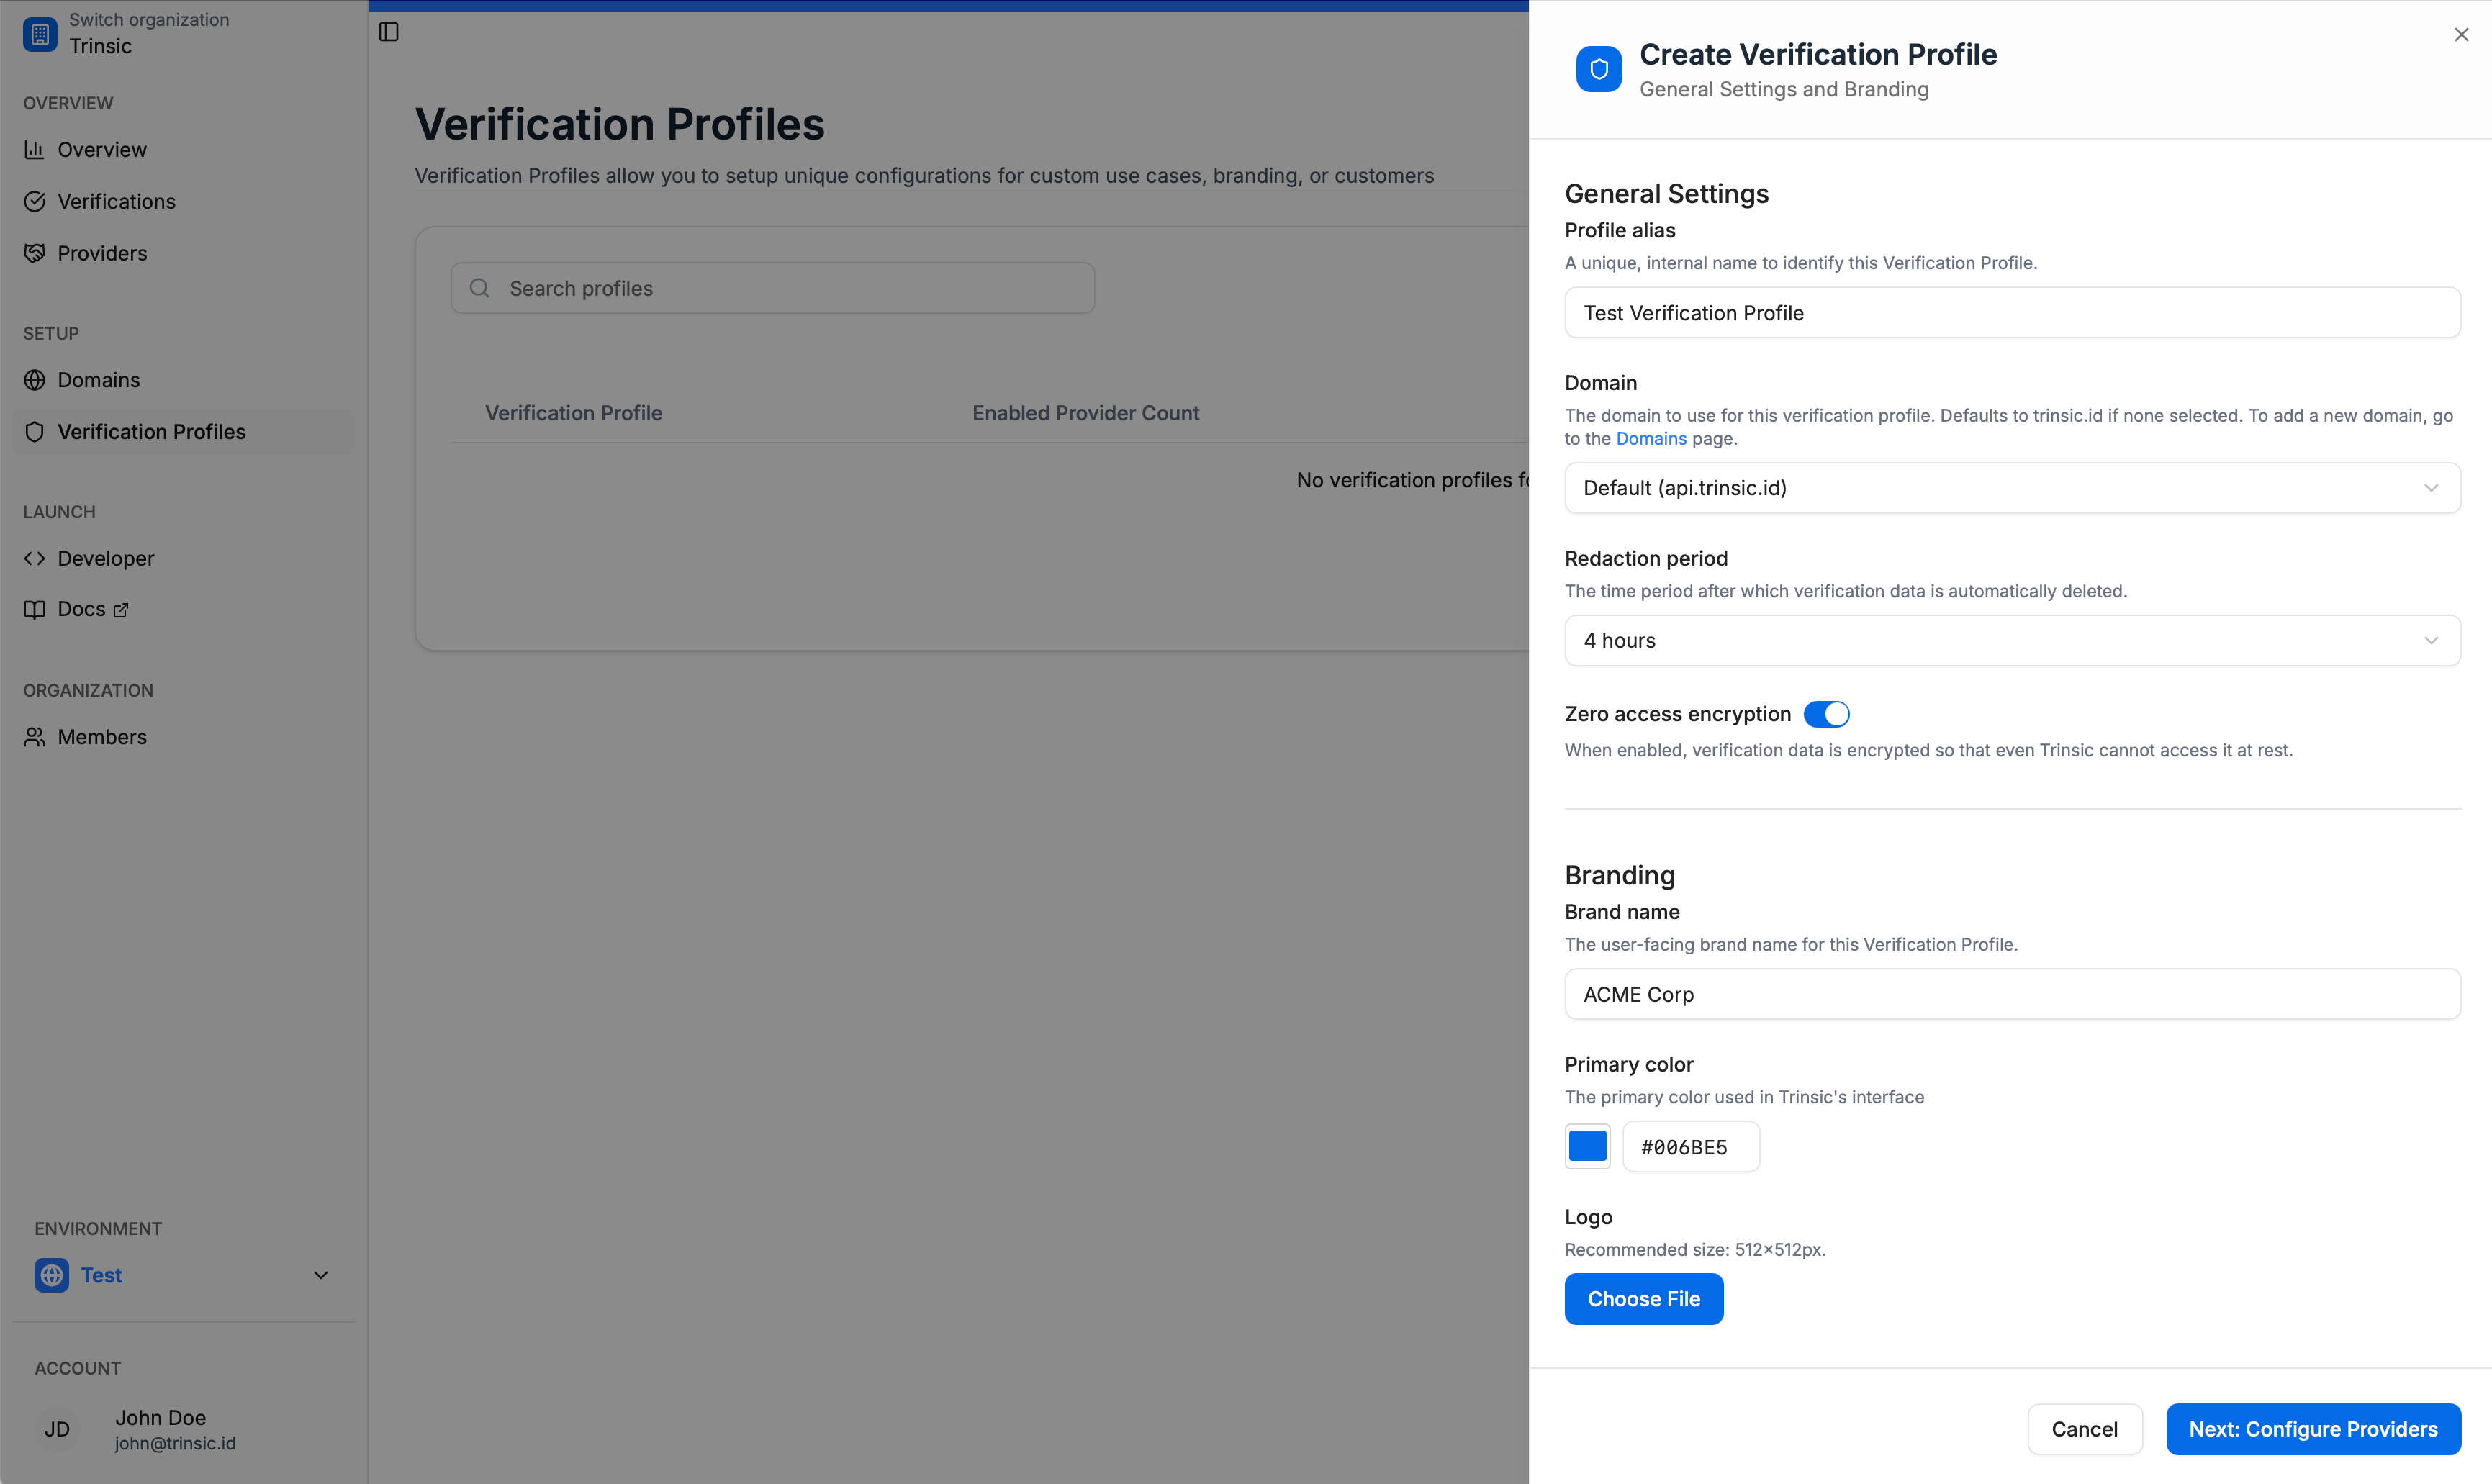
- Click Create Verification Profile.
- Configure the general settings for your Verification Profile.
- Profile alias: An internal name to help keep track of your Verification Profiles.
- Domain: The domain name to use for interstitial redirects and Trinsic-hosted UIs.
- Leave this as-is.
- Redaction period: The amount of time data from a verification will be stored in Trinsic's servers.
- Zero access encryption: Whether zero access encryption is enabled for this Verification Profile.
- Click Here to learn more about this feature
- Branding: The user-facing brand name, primary color, and logo shown to users in Trinsic's hosted UIs and in Identity Providers' applications.
- Click Next: Configure Providers.
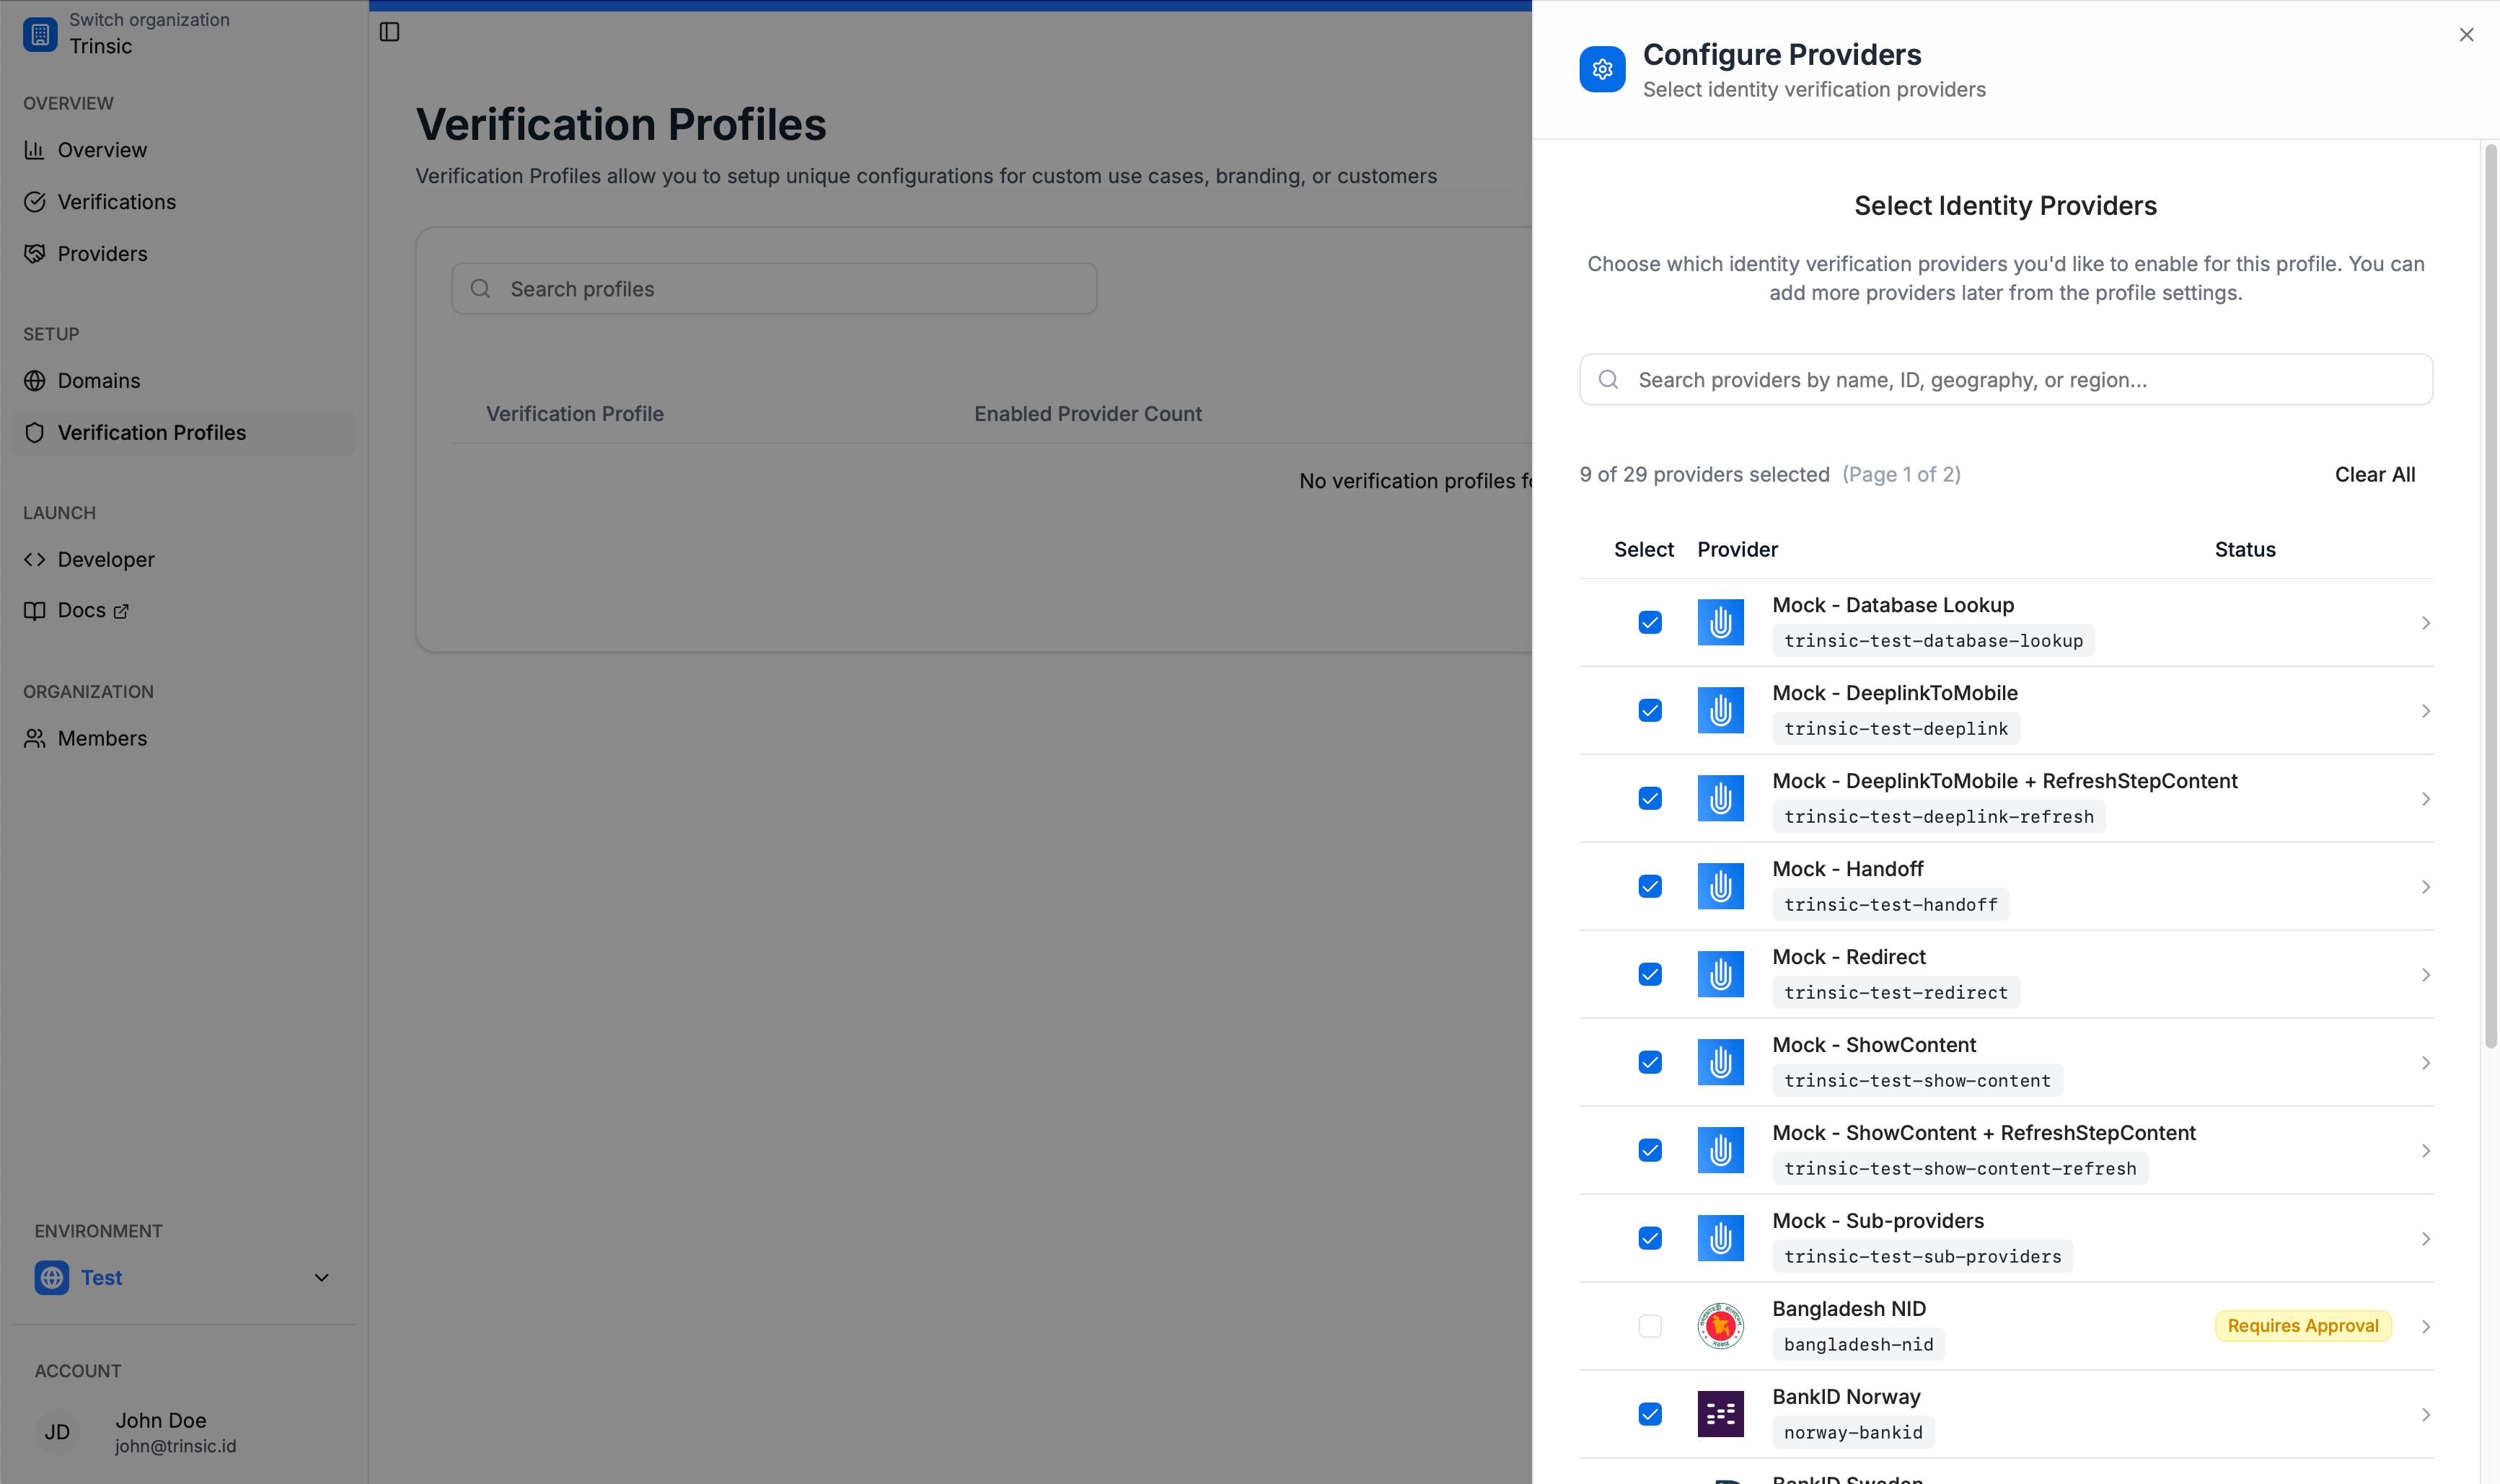
- Select the Providers you wish to enable for this Verification Profile.
- This can be changed after creation.
- We recommend selecting, at the very least, the
Mock - RedirectProvider. This provides the simplest and most straightforward testing experience.
- Click Add Providers at the bottom to finalize the creation of your Verification Profile.
- On the details page for your new Verification Profile, copy its ID. This can be found near the top.
- You will need this when making API calls.
Perform a test verification in the Dashboard
The quickest way to validate your Verification Profile's configuration and explore the verification experience is to launch a verification via the Dashboard.
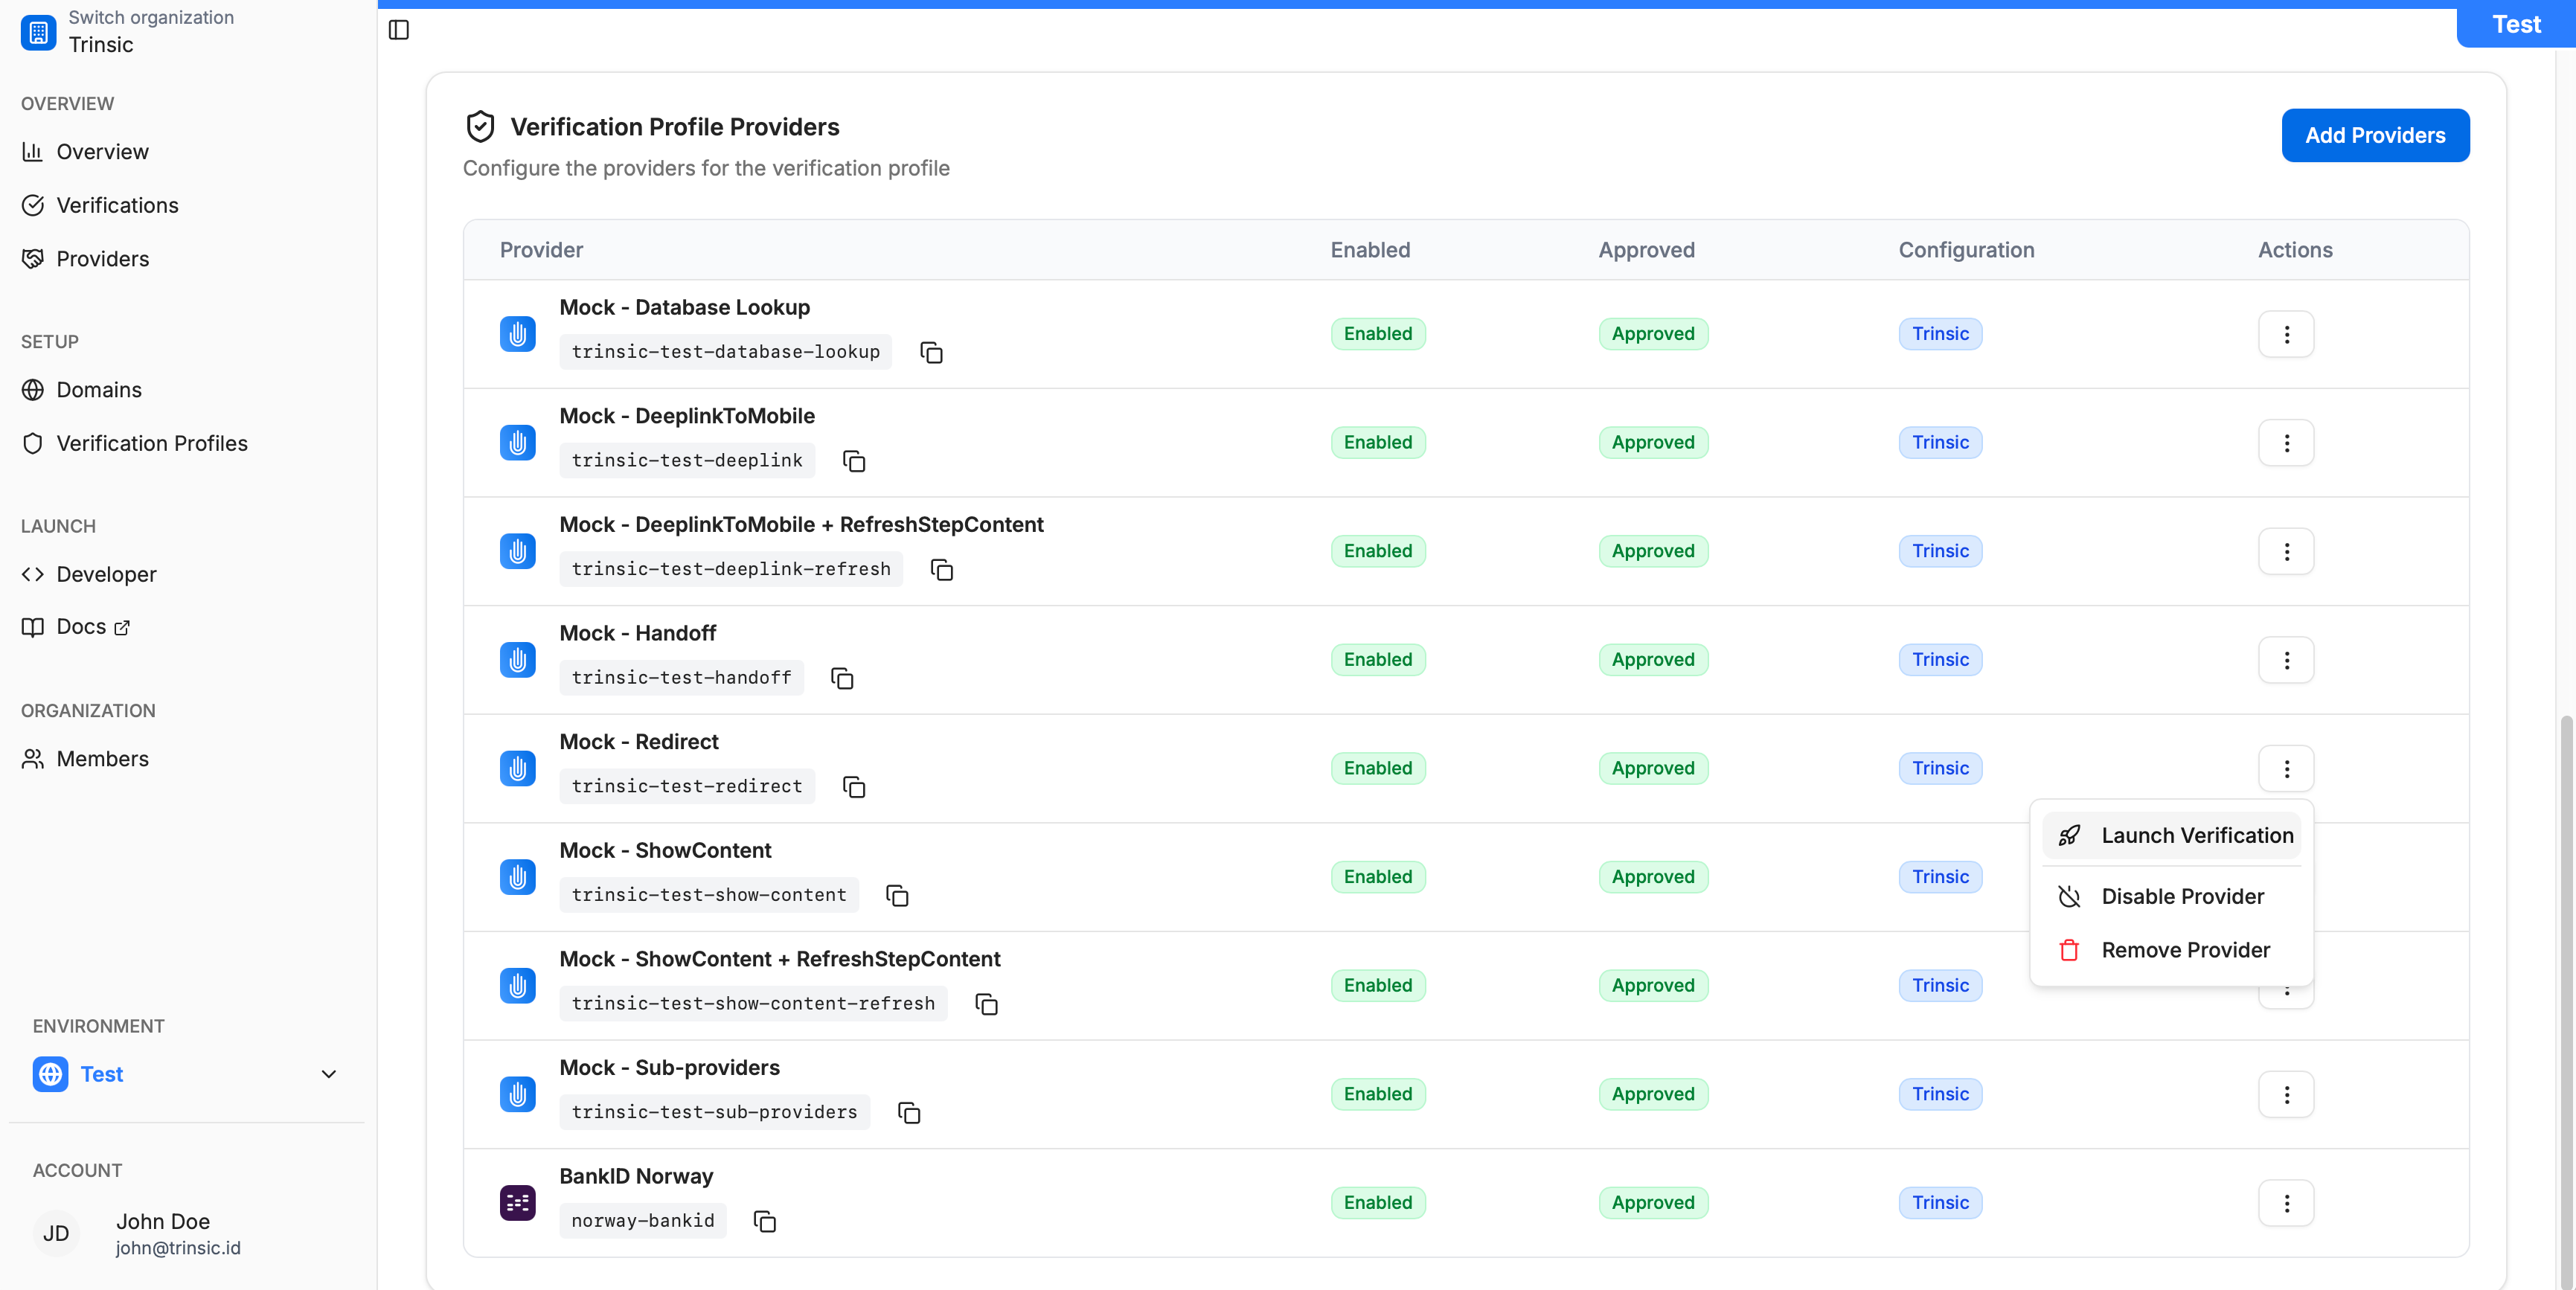
- On the details page for your Verification Profile, scroll down to the Verification Profile Providers table.
- Find the Provider for which you wish to launch a test verification.
- We recommend the
Mock - RedirectProvider.
- We recommend the
- Under the Actions column, click the three dots, then Launch Verification.
- Complete the verification in the newly-opened popup.
- Once done performing the verification, click View Session Results in your main browser window.

Integrate
Congratulations! You now have everything you need to begin integrating Trinsic's SDK:
- An Organization.
- An API Key.
- A configured Verification Profile with a corresponding
verificationProfileId.
Next, follow the Integration Guide to begin performing verifications in your own application.
Updated 3 months ago